Braiding Your Hair - Simple Styles For Everyone
There's something truly special about hair that has been carefully woven together. It just looks so put together, you know? A really nice braid, in a way, brings a certain polish to your overall appearance. It’s a look that feels both classic and fresh all at once, offering a pleasing way to keep your hair looking its best.
Beyond just looking good, a well-made braid is quite useful, too. It certainly keeps your hair from getting in your face throughout the day, which is always a plus. But it also adds a rather fun little twist to what might otherwise be just an ordinary hair day. It’s a simple change that can make a big difference in how you feel about your hair.
Perhaps you've thought about trying to create these styles yourself, but maybe it seems a little bit tricky. That's perfectly fine; many people feel that way at first. The good news is that learning how to braid your own hair is absolutely something you can do. We're going to talk about how you can start making some of these lovely braided looks right at home.
Table of Contents
- Why Consider Braiding Your Hair?
- What You Need Before You Learn how to braid?
- Getting Started - The Simple how to braid
- Can Anyone Learn how to braid Their Own Hair?
- Exploring Different Braiding Styles
- How to Braid a Classic Three-Strand Style?
- How to Braid a French Style?
- Tips for Keeping Your how to braid Neat
Why Consider Braiding Your Hair?
Braids are more than just a way to keep your hair pulled back; they really are a way to express yourself. Think about it: a braid can be casual for a relaxed afternoon or quite elegant for a special event. It’s pretty versatile, actually. The way it holds your hair can feel very comfortable, keeping strands out of your eyes when you're busy or just enjoying a calm moment.
It’s also a way to give your everyday appearance a bit of a fresh feeling. Sometimes, a simple ponytail or bun just doesn't quite hit the mark, does it? A braid, on the other hand, adds a bit of texture and visual interest that can really change your whole vibe. It’s a subtle touch, yet it makes a rather noticeable difference. You might find that you feel more confident and put-together when you have a nice braid in place.
For those who are active, or just want their hair to stay put, a braid is a very practical choice. It secures your hair in a way that feels dependable, so you don't have to worry about stray pieces escaping. This means you can go about your day with one less thing to think about. It’s about combining good looks with real-world usefulness, which is pretty neat.
What You Need Before You Learn how to braid?
Before you begin to figure out how to braid, gathering a few simple things can make the whole process much smoother. You don't need a lot of fancy items, just some basic hair tools that you probably already have around. Having these ready will help you focus on the hand movements rather than searching for what you need in the middle of things.
First, a good brush or comb is quite important. You'll want to make sure your hair is free of any tangles or knots before you start. Smooth hair is much easier to work with, allowing your fingers to move freely as you weave. A wide-tooth comb can be helpful for detangling, while a finer comb can assist with parting sections cleanly.
Next, you'll want some hair ties or elastics. These are for securing the end of your braid once it's done. Clear or hair-colored elastics tend to blend in nicely. You might also find some clips helpful for holding sections of hair out of the way while you concentrate on one part. A spray bottle with a little water can also be useful for dampening hair that's a bit too slippery or frizzy, making it easier to control.
And of course, a mirror is absolutely essential, especially when you're learning how to braid your own hair. A large mirror where you can see the back of your head is ideal. Some people even use two mirrors, one in front and a hand mirror for the back, to get a really good view of what they are doing. This visual feedback is key to understanding the movements and making sure your braid is coming together just right.
Getting Started - The Simple how to braid
Many people think that creating braids requires a lot of quick hand movements and can be rather tricky to do on yourself. While it's true that it takes a little bit of practice to get your fingers used to the rhythm, it's certainly not something that is out of reach. Learning how to braid your own hair is a skill that builds over time, much like learning any new craft.
The key is to start with the basics and be patient with yourself. You won't be creating intricate designs right away, and that's perfectly okay. The goal is to get comfortable with the fundamental actions. Once you understand the core idea of weaving hair sections together, you can then build upon that knowledge to try out more involved styles. It's about getting the feel for the hair and the motion.
A good way to begin is by sitting in front of your mirror, perhaps with some good lighting, and just taking your time. There's no rush to get it perfect on the first try, or even the tenth. The idea is to understand the process, to let your hands get accustomed to holding and crossing the hair. Each attempt, even if it doesn't look exactly how you imagined, is a step forward in your learning.
Can Anyone Learn how to braid Their Own Hair?
Absolutely, learning how to braid your own hair is definitely possible for almost anyone. It's a skill that many people pick up with a bit of dedication. You might feel a little awkward at first, especially when trying to reach the back of your head, but that's a common experience. The good news is that your hands and fingers will start to remember the motions after a while, making it much easier.
The most important thing is to simply begin and keep trying. There are many ways to approach learning, and what works for one person might be slightly different for another. Some people prefer to watch someone else do it very slowly, while others learn best by just trying it out for themselves. The key is to find a way that helps you understand the crossing and pulling of the hair sections.
Even if your hair feels like it's a bit of a challenge to work with, perhaps it's very fine or quite thick, there are approaches that can help. Sometimes, a little bit of product, like a light styling cream, can give fine hair more grip, or help smooth down thicker hair. The basic principles of braiding remain the same, regardless of your hair's natural texture or length. It's more about getting the hang of the hand movements.
Exploring Different Braiding Styles
Once you get a feel for the basic movements of how to braid, a whole world of different looks opens up. There are so many neat ways to weave hair, each with its own special appearance. From the very straightforward to those that seem a little more intricate, there’s a braid style for almost every occasion and every mood. It’s pretty exciting to see what you can create.
Some styles are really popular because they offer a fresh take on classic looks. You might have heard of a few, like the classic three-strand, or perhaps the fishtail, which has a rather delicate, woven look. Then there’s the French style, which starts at the top of your head and gradually brings in more hair as it goes down. The Dutch version of this is similar, but it makes the braid stand out a bit more from your head.
Beyond these, there are other interesting types, too. The rope style, for example, is made by twisting two sections of hair around each other, giving a very different texture. The ladder style creates a series of small, horizontal braids that connect to a main one, which is quite unique. And for those who enjoy a softer, more romantic feel, the halo and waterfall styles are really beautiful. Each one offers a chance to play with your hair in a new way.
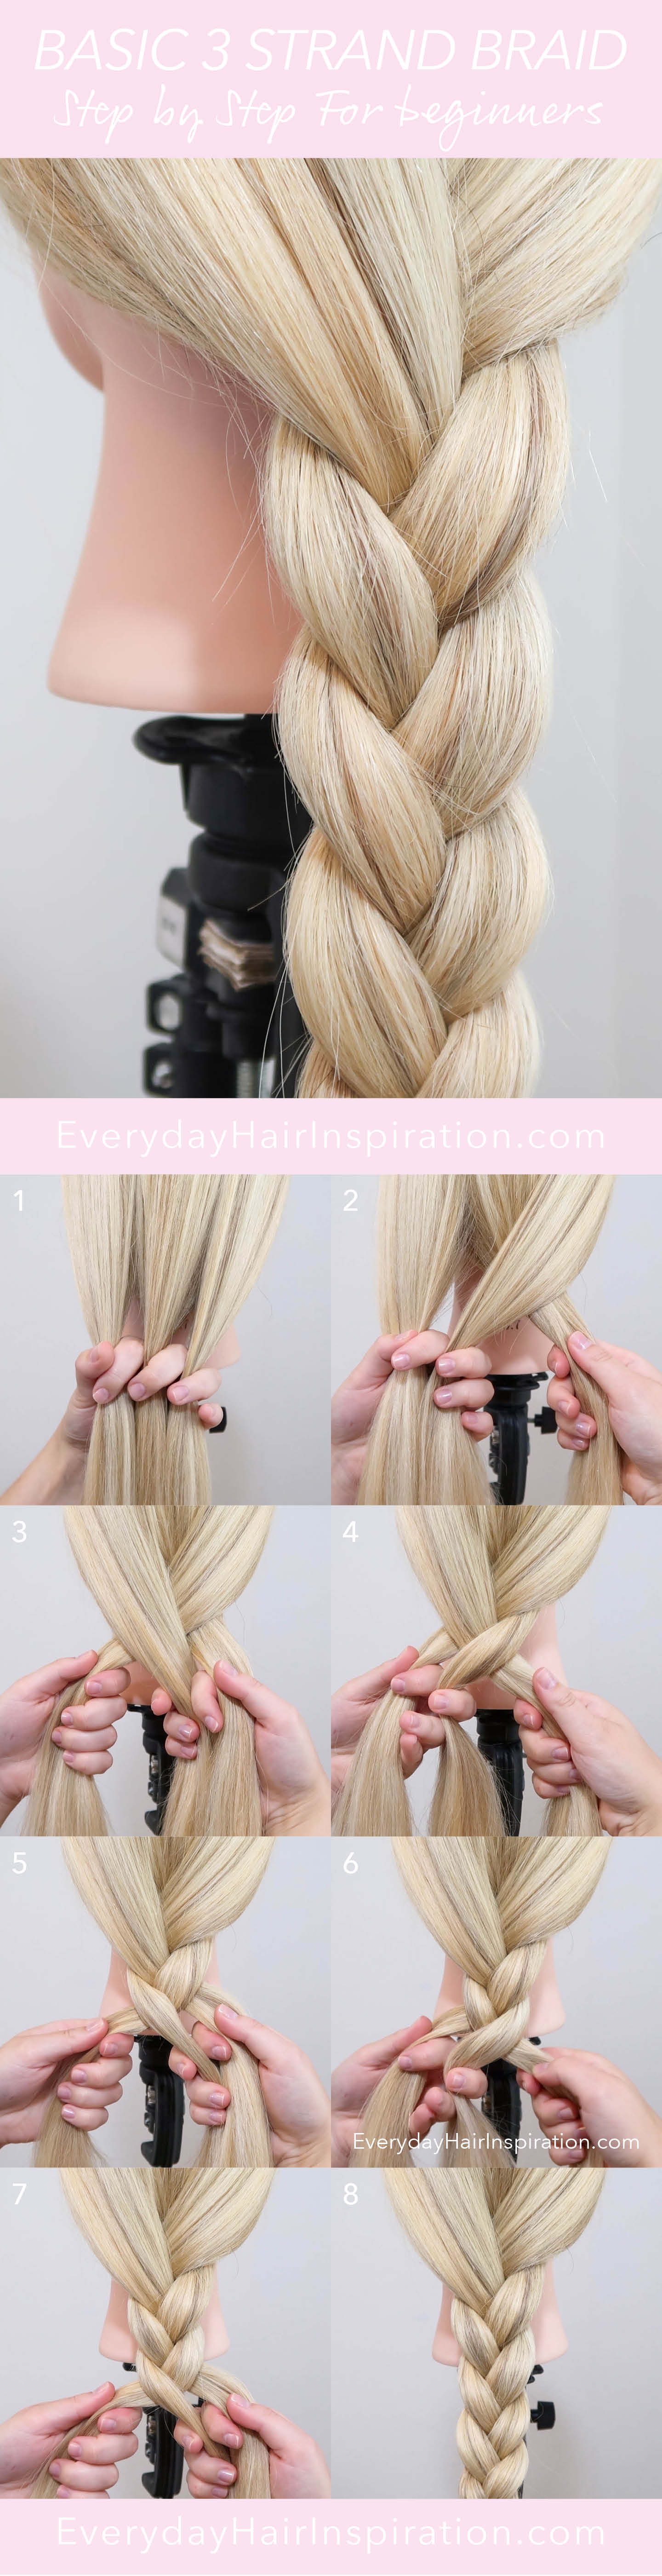
How to Braid a Classic Three-Strand Style?
Let's talk about the very first step in learning how to braid: the classic three-strand style. This is the foundation for so many other braids, and once you have this down, you'll feel much more confident. It's a simple, straightforward process that involves just three sections of hair.
To begin, gather the hair you want to braid into one section. You can start with a ponytail if that feels easier, or just a section of hair from the back of your head. Now, divide this section of hair into three equal parts. It’s important that these parts are roughly the same size, as this helps the braid look even. You can hold one section in your left hand, one in your right, and let the middle one hang free for a moment.
Now, here's the main movement: take the section of hair from your right side and cross it over the middle section. The piece that was on the right is now in the middle. Then, take the section of hair from your left side and cross it over what is now the new middle section. So, it's always an outside piece crossing over the middle. You just keep repeating this pattern: right over middle, then left over middle, working your way down the length of the hair.
As you continue, try to keep an even tension on the hair. This means pulling each section with roughly the same amount of pressure as you cross it. If you pull too tightly on one side and too loosely on the other, the braid might look a bit uneven. Just keep going until you reach the end of the hair, or as far down as you want the braid to go. Then, simply secure the end with a hair tie. And there you have it, your very first classic braid!
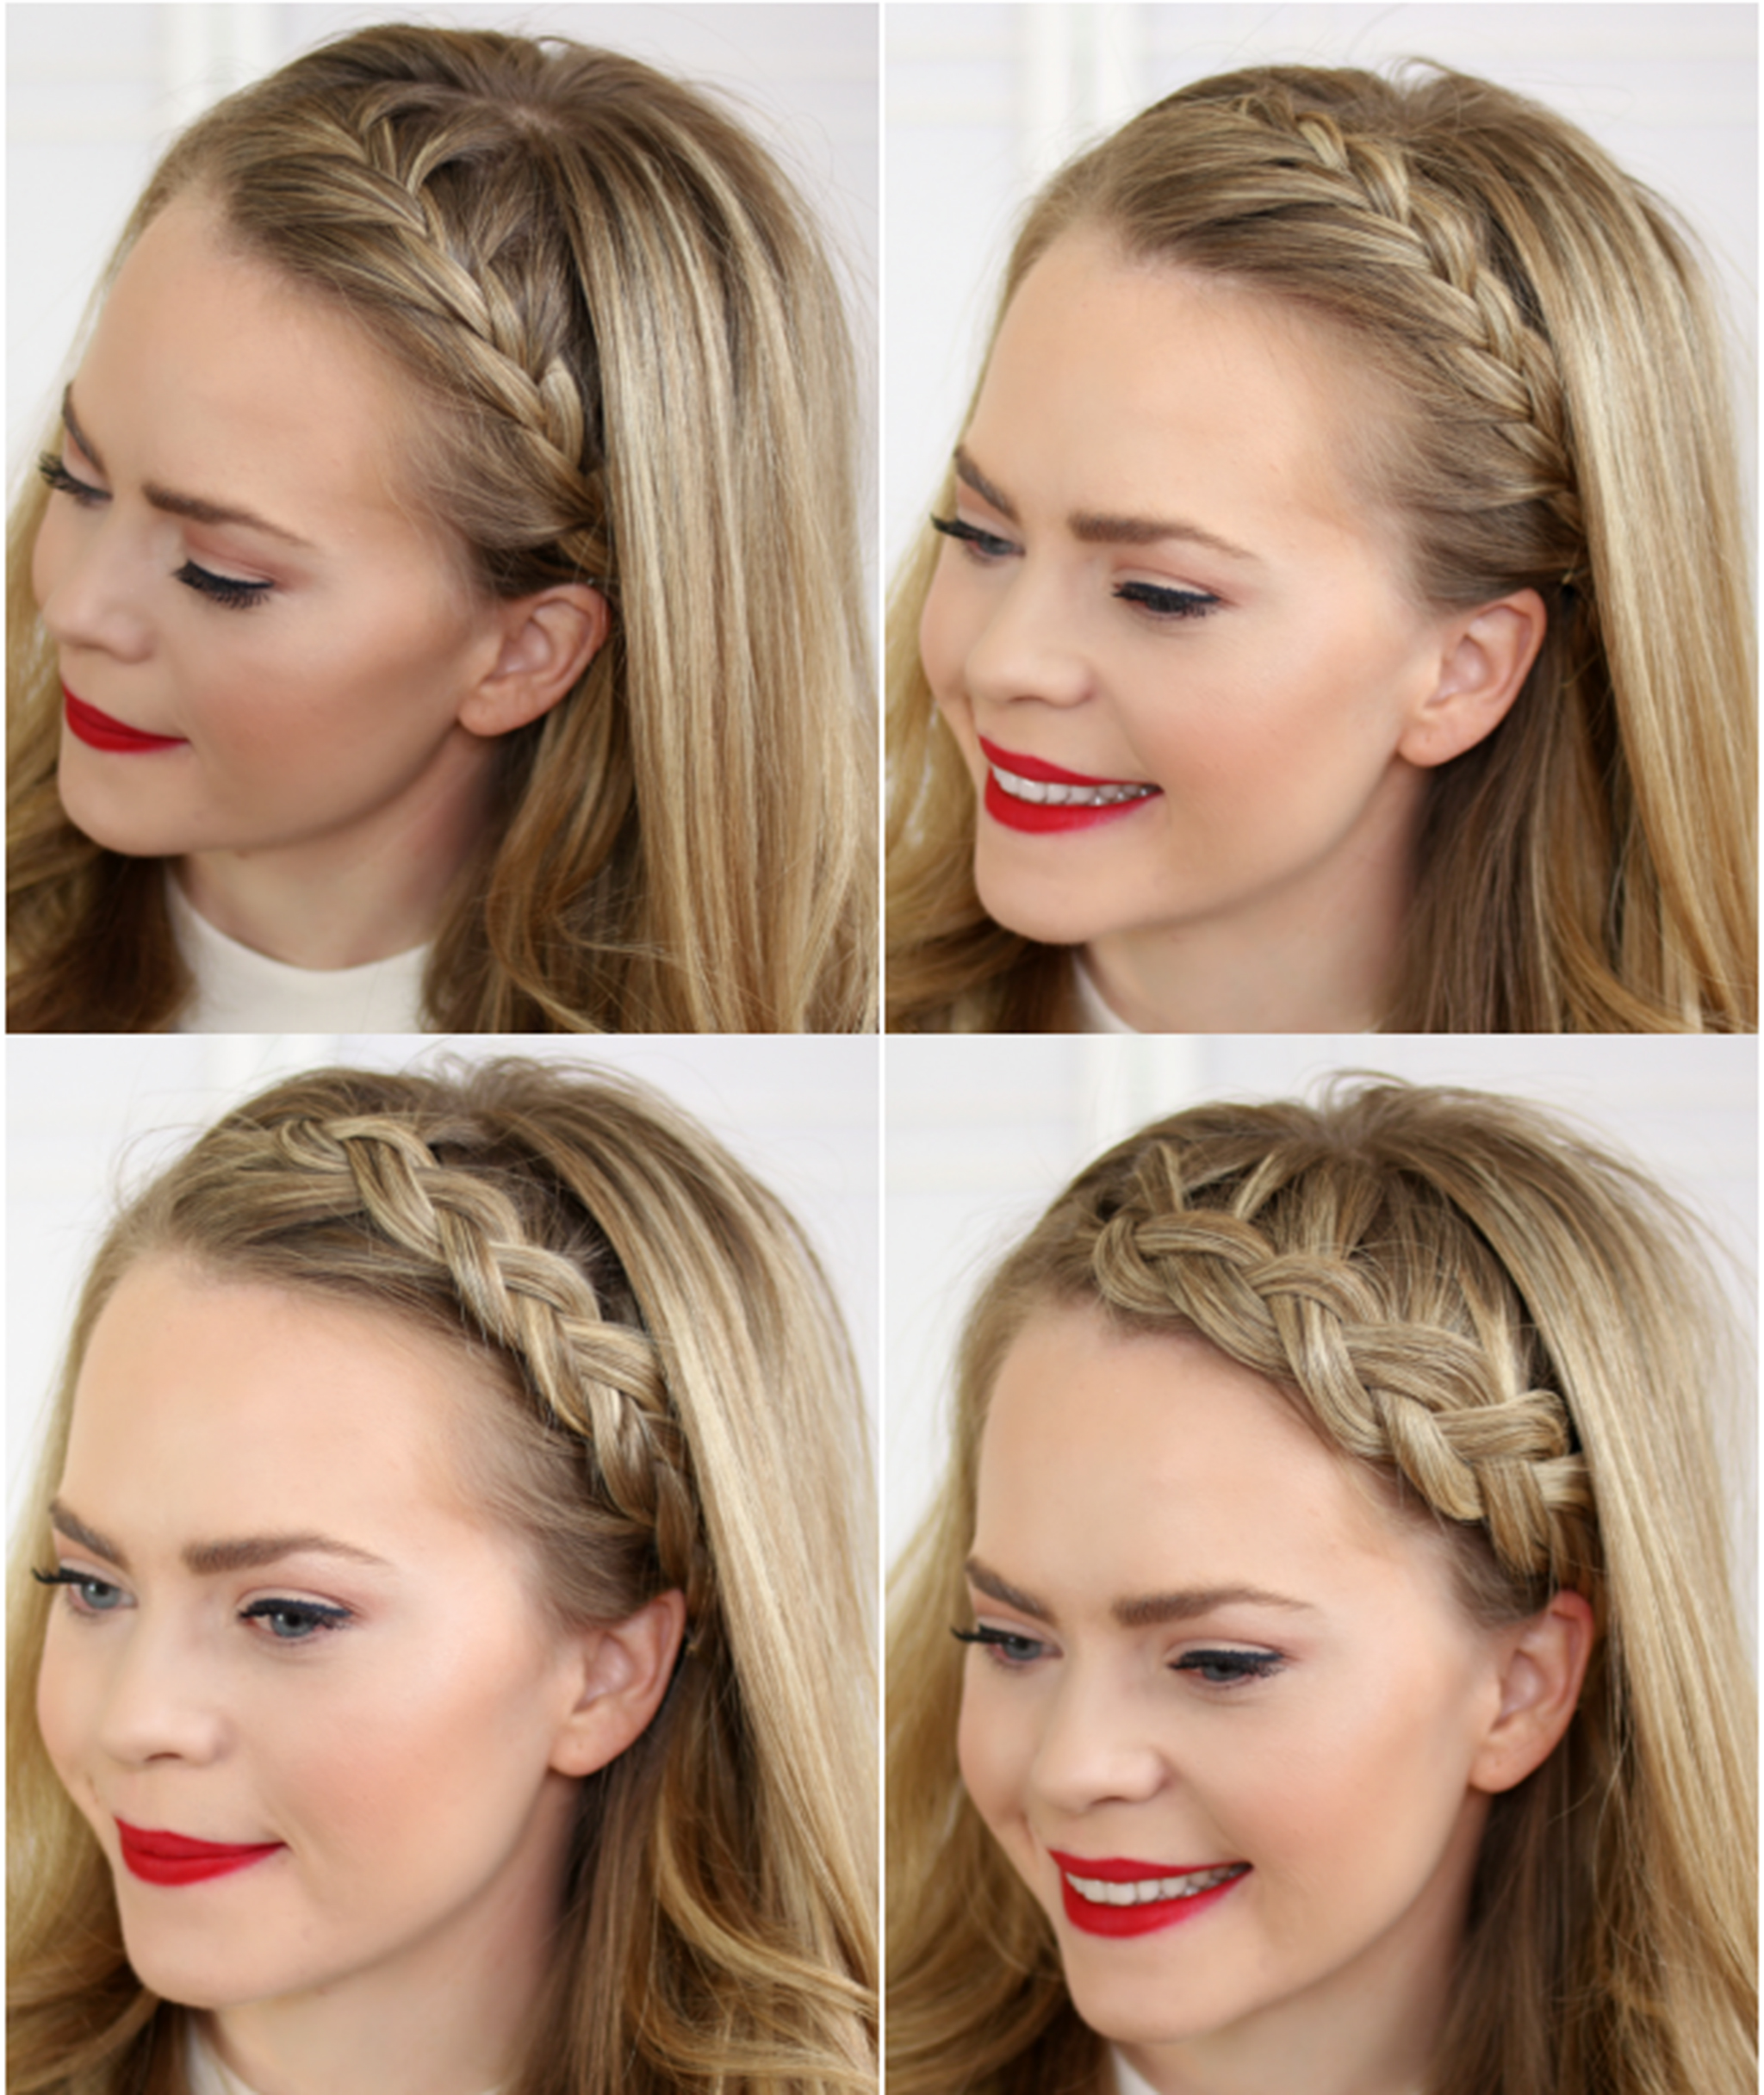
How to Braid a French Style?
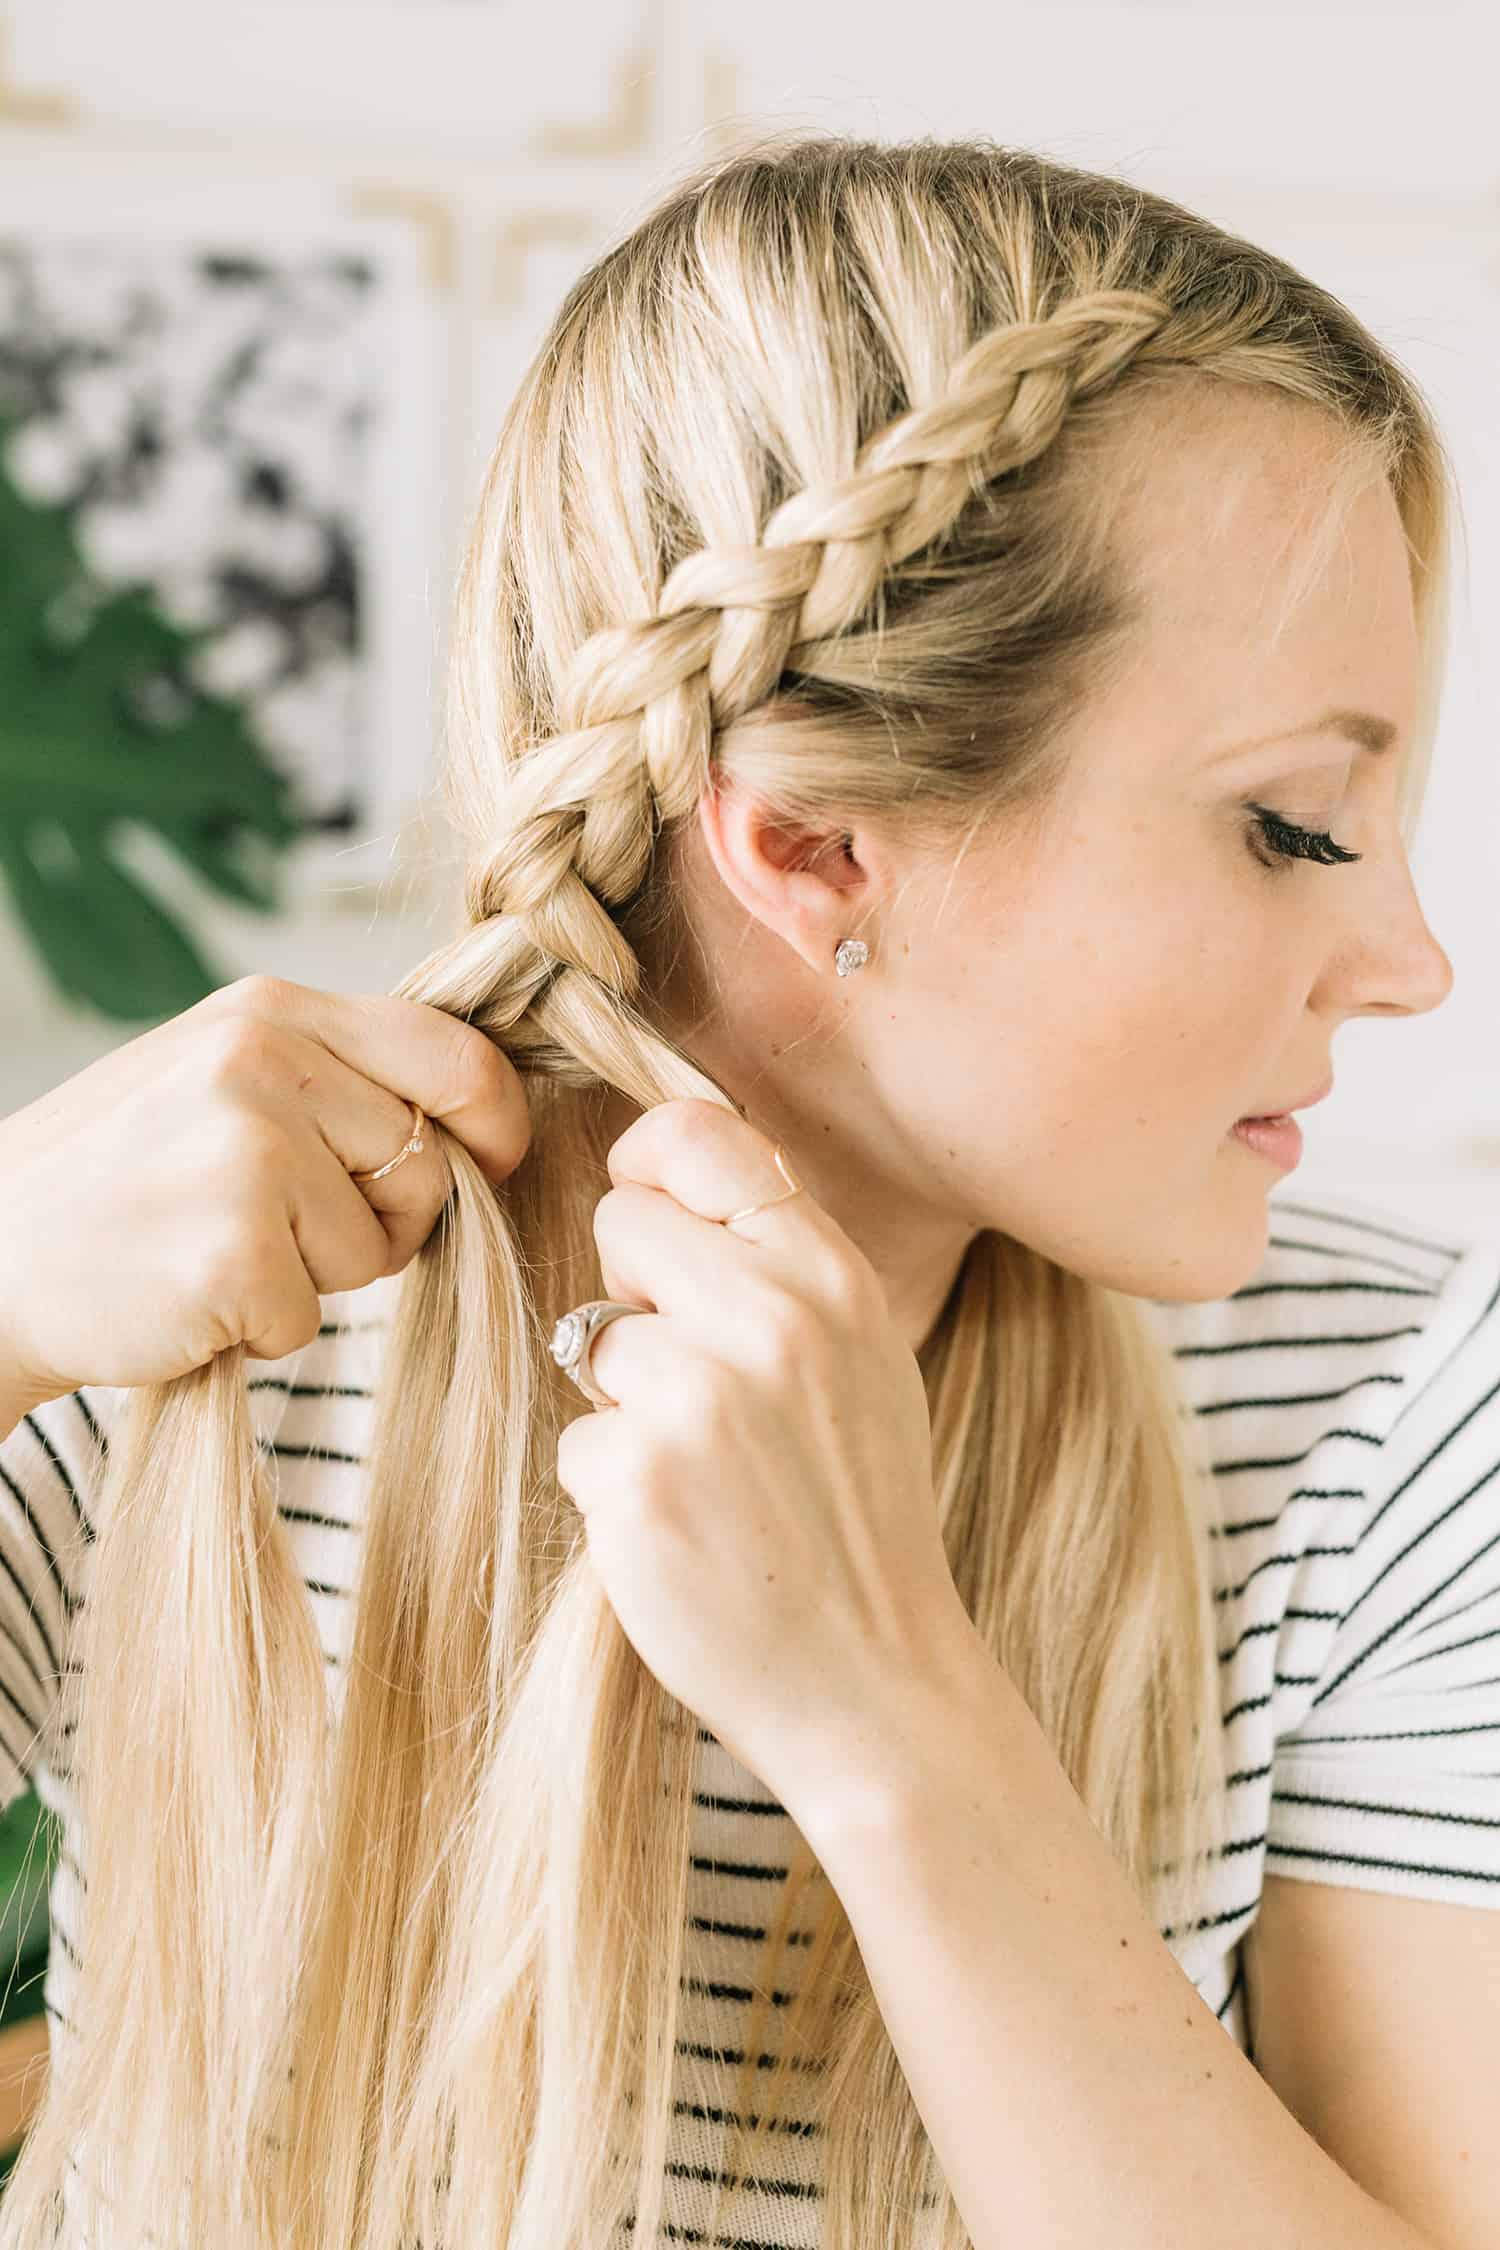
Once you feel comfortable with the classic three-strand, you might want to try learning how to braid a French style. This one is a bit different because you start at the top of your head and add hair as you go along. It creates a braid that lies flat against your head, which is a rather elegant look.
To start, take a section of hair from the very top of your head, near your forehead. This initial section should be fairly small, perhaps a couple of inches wide. Divide this small section into three equal parts, just like you would for a classic braid.
Now, make one pass of the classic braid: cross the right section over the middle, then the left section over the new middle. This sets up your base. Here’s where the French style gets its unique touch: before you make the next cross, you're going to pick up a small amount of loose hair from the side of your head and add it to the section you are about to cross.
So, for your next step, take the rightmost section, pick up a small, equal amount of loose hair from the right side of your head, and add it to that right section. Now, cross this combined, larger right section over the middle. Do the same for the left side: take the leftmost section, add a small, equal amount of loose hair from the left side of your head to it, and then cross this combined left section over the new middle.
You just keep repeating this process, adding a bit of new hair to each outside section before you cross it over the middle. As you work your way down your head, you'll be incorporating all the loose hair into the braid. Try to keep your added sections consistent in size to help the braid look smooth. Once you run out of loose hair to add, you can simply finish the rest of the length with a classic three-strand braid and secure it. It's a beautiful way to keep hair pulled back from your face.
Tips for Keeping Your how to braid Neat
Making sure your braids look neat and tidy is something many people aim for. While the first few attempts might have a few stray pieces, there are some simple things you can do to help keep your how to braid looking immaculate. It's all about preparation and a little bit of attention to detail as you work.
One good idea is to start with hair that's not too slippery. Hair that's freshly washed and very clean can sometimes be a bit difficult to grip. If your hair is like this, try braiding it on the second day after washing, or you can add a little bit of texturizing spray or dry shampoo to give it some grip. This helps the sections hold together better as you weave them.
Another tip is to make sure your sections of hair are very clearly separated before you start crossing them. Using a comb to create clean parts can make a big difference, especially for styles like the French or Dutch braids where you're adding hair. If your sections are messy from the beginning, it’s much harder to make the braid look polished.
Maintaining an even tension throughout the braiding process is also quite important. Try to pull each section with the same amount of firmness. If some parts are loose and others are tight, the braid will look uneven. It takes a little practice to get this right, but paying attention to how much you're pulling each time will help you get a consistent result.
Finally, don't be afraid to use a little bit of hairspray or a light styling cream once your braid is finished. A gentle mist of hairspray can help tame any small flyaways that might pop out. If you have very fine hair, a bit of cream can help smooth it down and add a bit of weight, making it easier to control. These small touches can really help give your finished braid a very neat and put-together appearance.
Ultimate Guide To Braiding: Master The Art Of Intricate Hair
Learn, How To Create 15 Beautiful Braided Hairstyles, Sew Tutorial
The Secret Of Info About How Do We French Braids Cute Easy Junior High
